Hello there! I'm Nuha from the blog
Habibi. I've been a long-time fan of Jessica's blog and I am so honored to be back again guest posting! Besides being an incredible blog designer and having an eye for the most amazing Etsy shops, Jess has become a good friend. When she asked me to guest post I knew I wanted to do a baking or DIY post. If you know me, you know that I absolutely adore anything mini, pink, gold, and glittery.
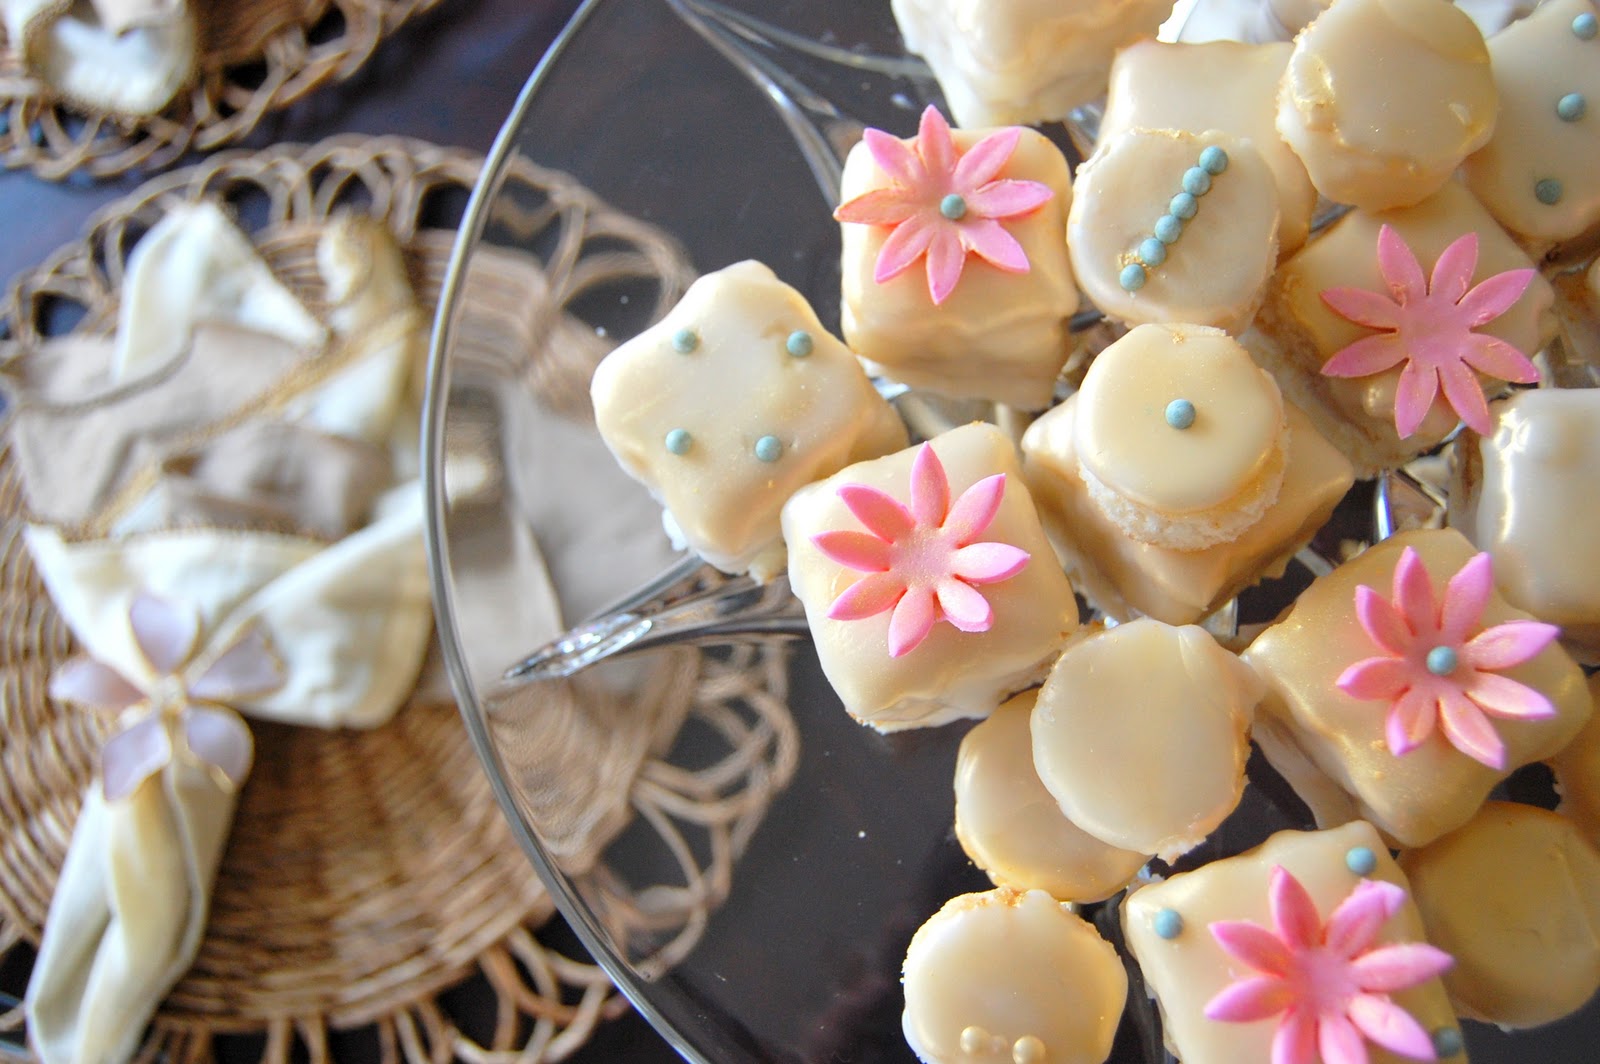
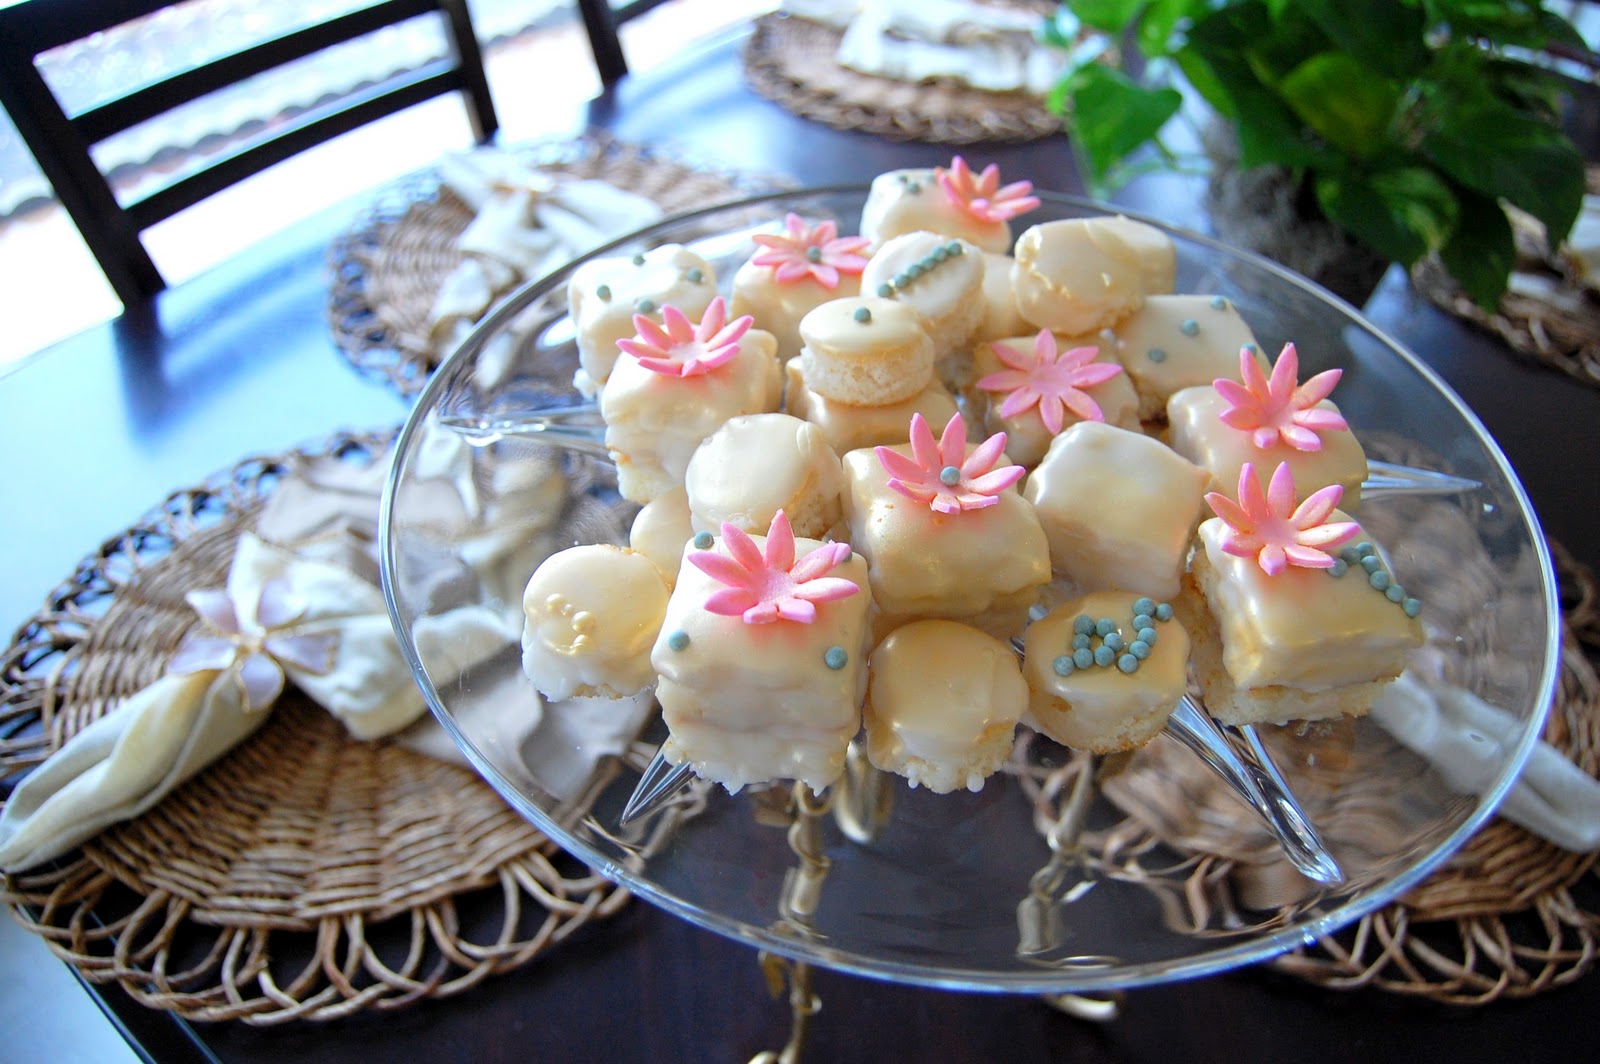
(What girl doesn't?!) If you combine those 4 things you basically end up with the most girlish dessert ever-
petit fours. And what better time to make them than the holiday season. Your guests will think you're pretty awesome when you offer them these. And trust me, they're easy :-)
WHAT YOU WILL NEED:
- 1 box cake mix of your choice (and the ingredients needed to bake it)
- Cookie sheet pan (or you may call it a jelly roll pan)
- Your choice of fruit preserve
- Cooling Rack
OPTIONAL:
- Gum Paste or Fondant (tastes better than gum paste!)
- Non-pariels
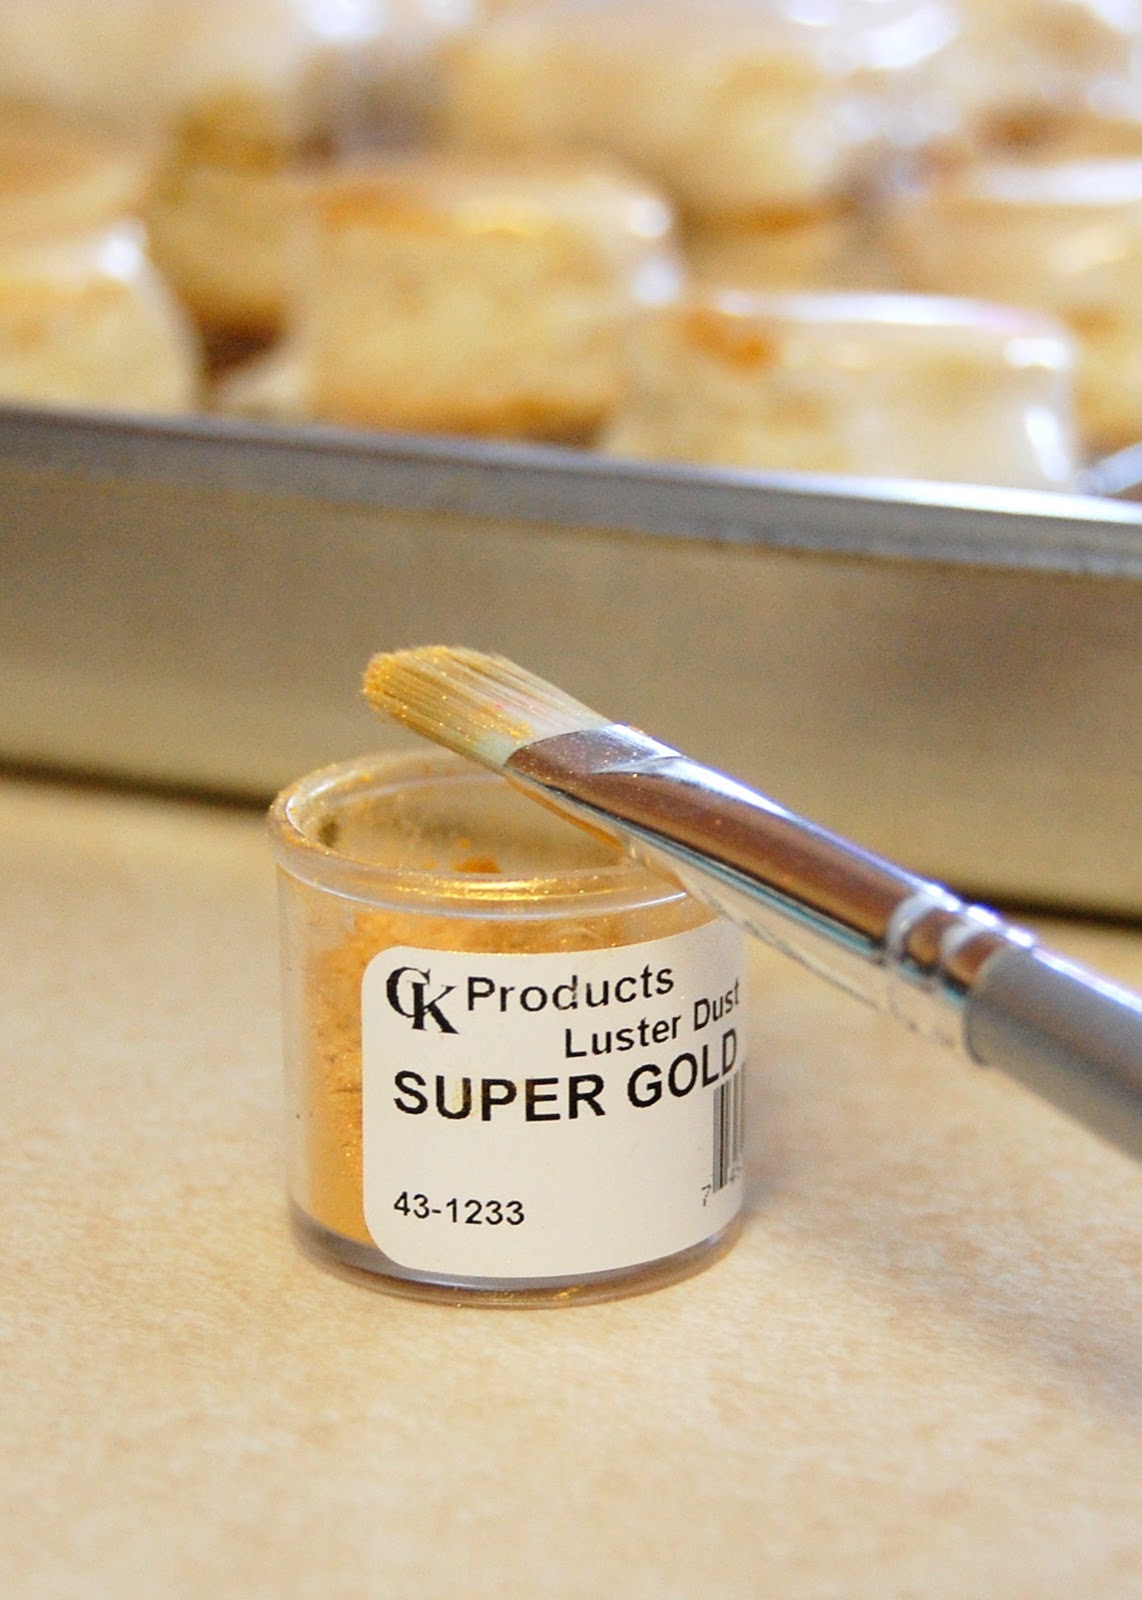
- Luster dust
FONDANT ICING:
- 2 lb. Bag of powdered sugar
- 3/4 Cup water
- 3 tbs Karo Syrup
- Extract flavoring of your choice (I used lemon)
DIRECTIONS:
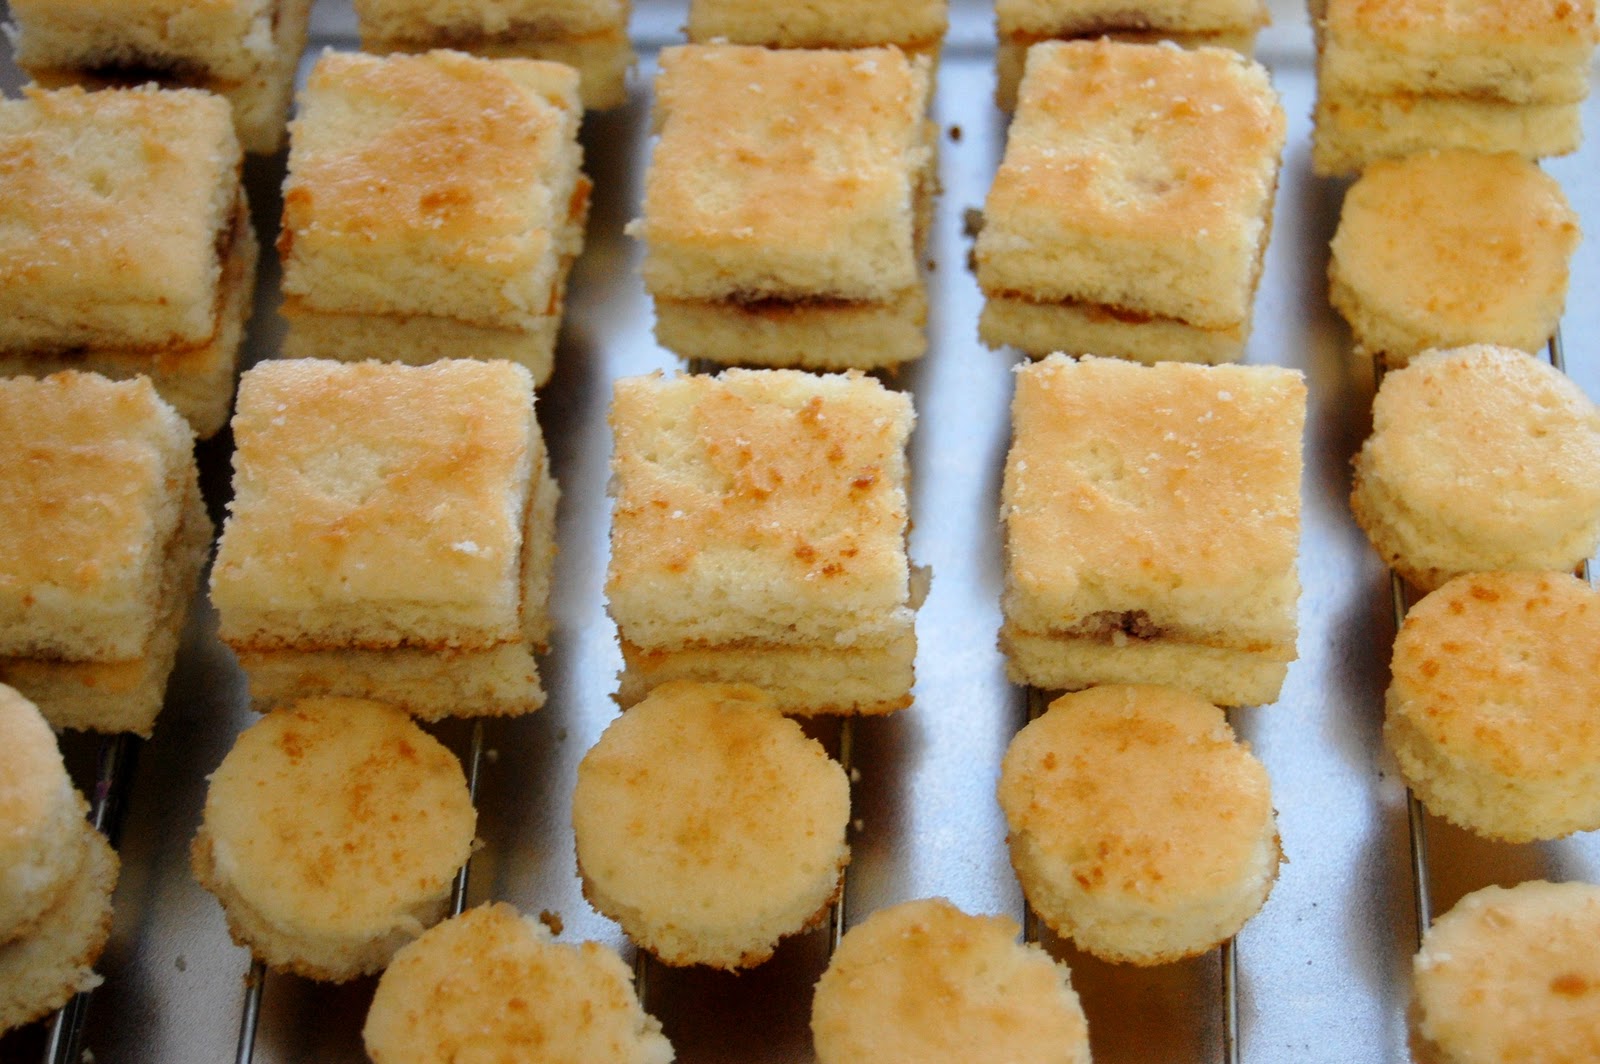
Bake your cake as directed in your cookie sheet pan. Let it cool. Invert it on a flat surface and cut off the edges. Cut your cake in half so that you half so that you now have two, roughly, 5x7 pieces.
{*Note: Don't confuse this with slicing your cake in half in the center (as you would a normal, thicker cake) since this cake is already so thin, you cut the overall cake into smaller portions to stack*}
Stack the two pieces on top of each other, adding a layer of preserves in between. Cover with plastic wrap and freeze overnight.
{Freezing the cake helps reduce the amount of crumbs :-)}
When you're ready to ice your cakes, pull the cake out of the freezer and cut into your desired size and shape. I used square and circle cookie cut-outs to ensure that each piece came out the same size.
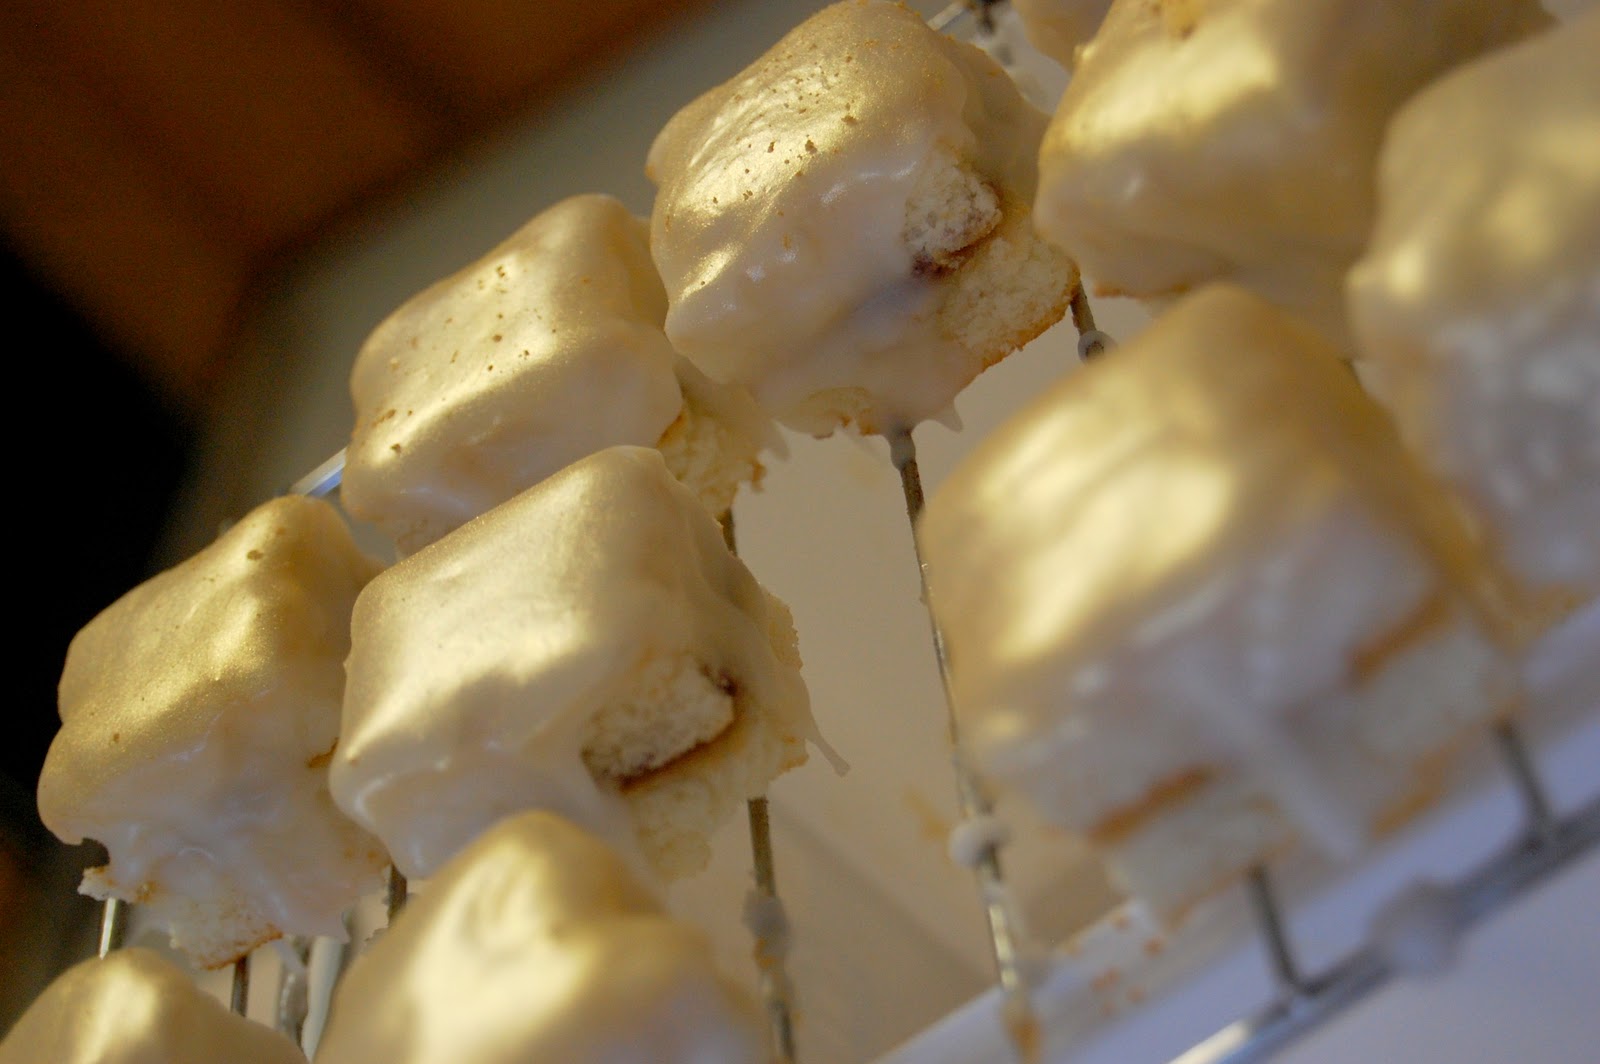
Place a cooling rack over your cookie sheet pan (or any pan that's as large as the cooling rack). Next, place the individual cakes on the cooling rack-making sure the sides aren't touching. I'd suggest only doing a few at a time (about 6-7) just to make things easier. That way you won't worry about not being able to fully cover each individual cake.
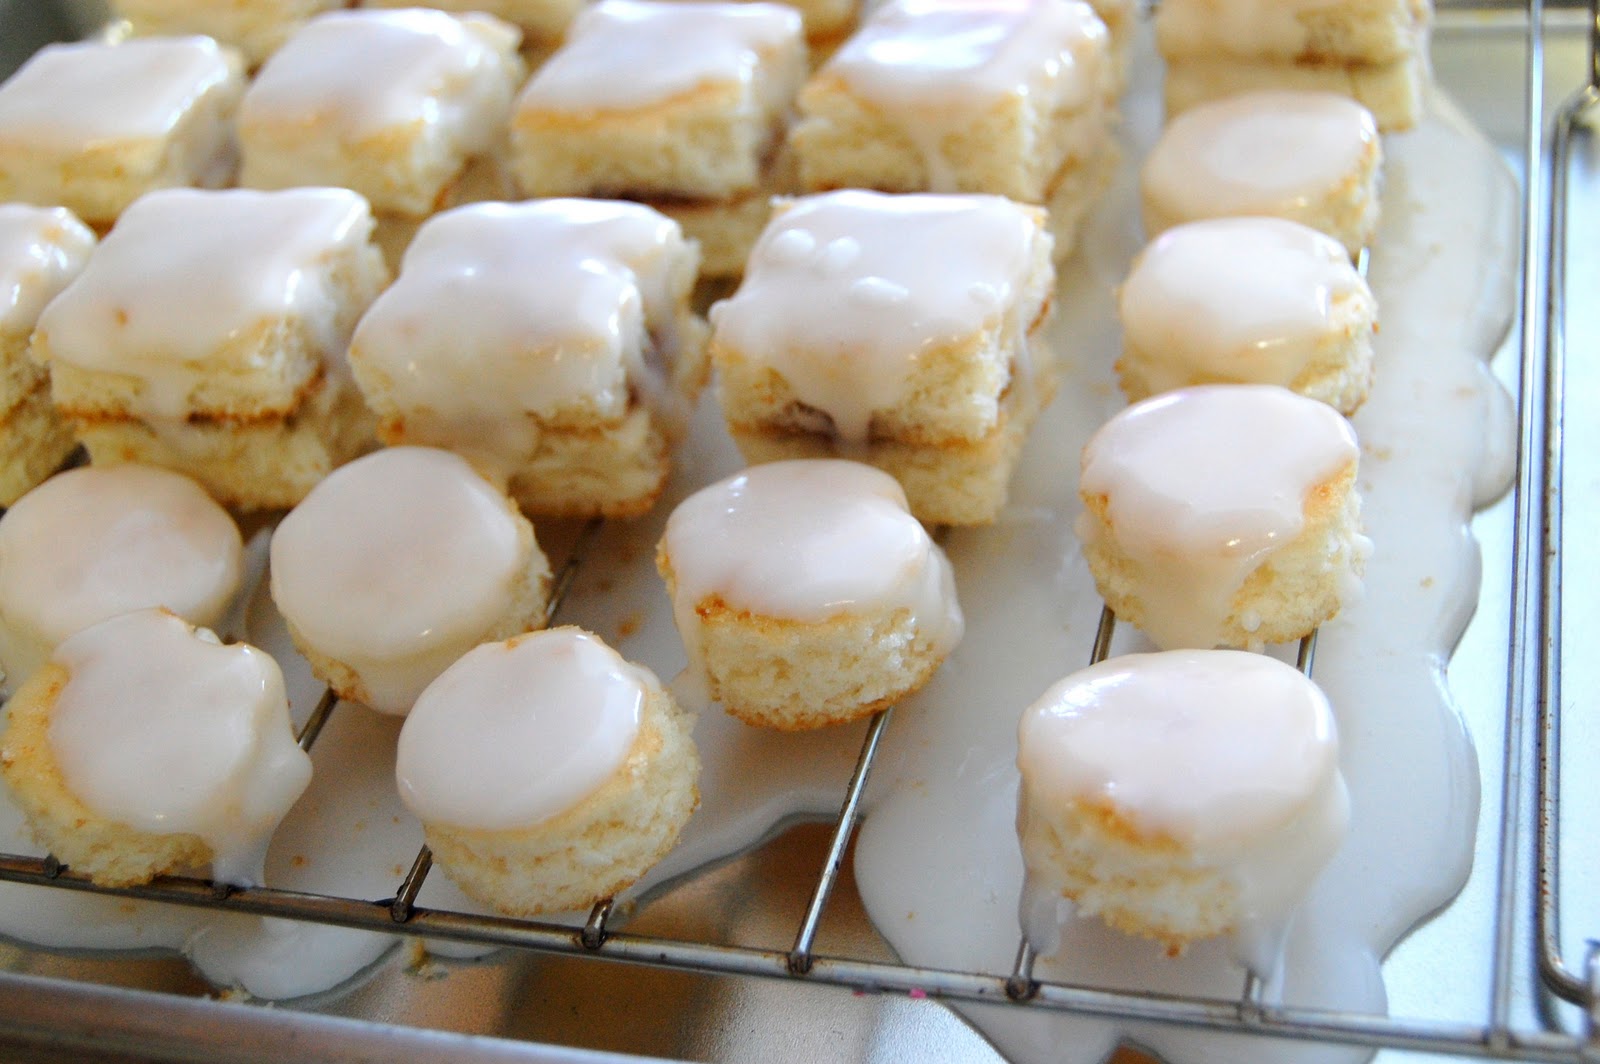
Next up, make your icing. Start off by mixing your Karo syrup into your water. This helps to make sure you don't just end up with a blob of Karo syrup in your powdered sugar. Then, using your stove, combine your water mixture with your powdered sugar on a LOW heat. We're talking so low that you can still comfortably put your hand on the pot. Stir frequently. Whenever everything has melted and you're ready to pour your fondant add your extract.
I found that the easiest way to pour was straight from the pot. Don't worry about "wasting" the fondant, because anything that the bottom pan catches, you can re-heat and re-use. Plus, the cakes look better with a thicker coating of icing :-) How you ice these is up to you. I find that pouring in the center of each cake and circling around the sides is the best way to make sure the whole cake gets covered. Then, move on to the next cake and repeat. Like I said, be liberal with the icing- you can re-use what falls into the underlying cake pan. Also, when re-heating the icing, if it gets too thick you can add a tbsp of water to thin it out. A little water goes a long way!
I ended up going over these and covering them with another coat of icing to make sure the sides were covered too.
To glam these up a little bit I cut out some sugar paste flowers and dry painted gold luster dust on them. When the icing dried I dry painted luster dust on those too. I'm pretty much obsess with gold luster dust. I should also mention that I keep a few paint brushes set aside specifically for baking.
This is probably the best picture that captures how gorgeous the gold luster dust is. Trust me, it's even prettier in person!
And for some extra color, I added green non-pariels. My tip for non-pariels is buying them in a plain white color and using either food coloring or luster dust to dye them the color of your choice. Just put some non-pariels in a sandwich bag, add the coloring, mix, and voila- Your own custom shade :-)
Thanks again Jess for having me! I really hope you all try to make these- I'd love to see pictures if you do! They are so easy to make and so pretty to look at!
. . . . . . . . . . . . . . . . . . . .
Thanks
Nuha! These little desserts look so cute... and easy to make! They would be perfect for an upcoming Holiday party or bridal/baby shower... I definitely have to keep these in mind next time I want to impress my family & friends! :)