Create // Painted Diamond Earrings

creative index: painted clay earrings

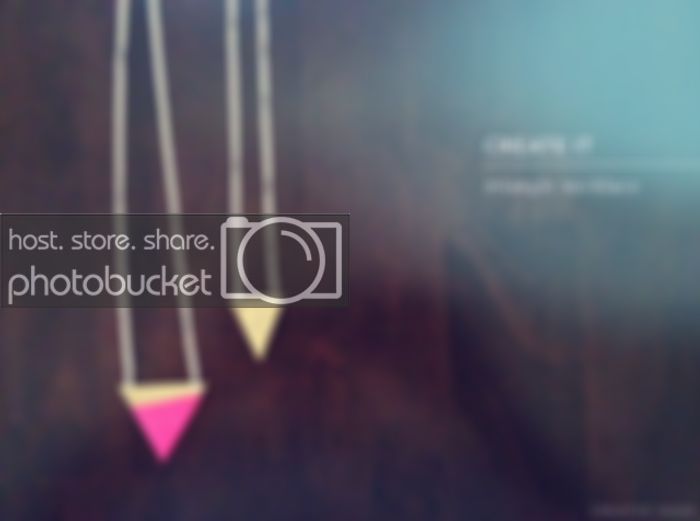
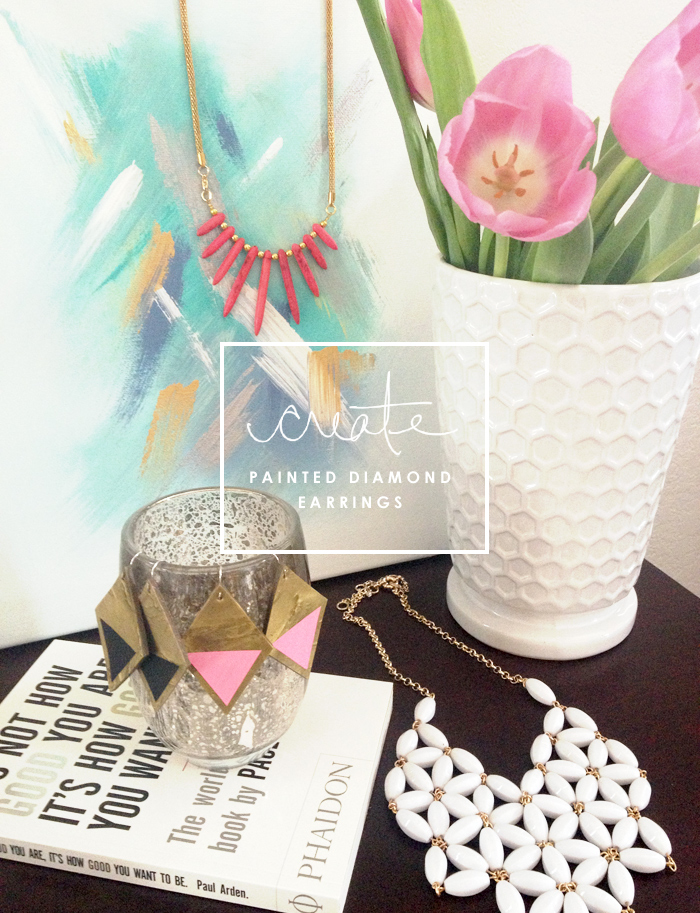
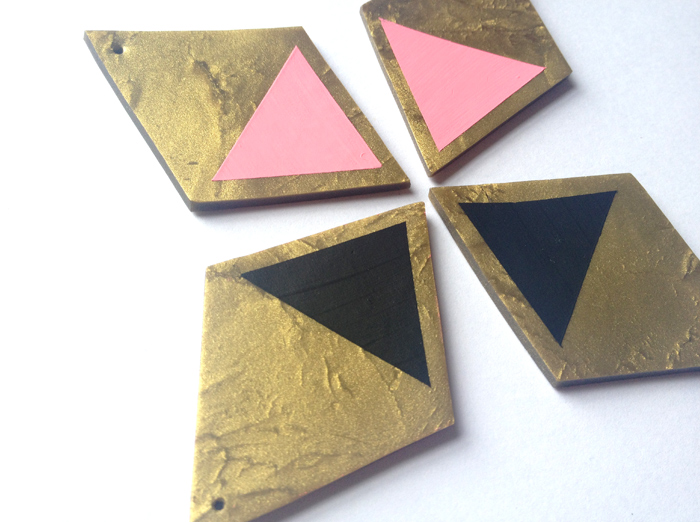
It's been awhile since I've done anything crafty. I was feeling inspired this weekend and decided to step away from the computer for a little bit and make something fun. I dug out some polymer clay and made a super fun pair of earrings. I love simple, clean lines and geometric shapes and these painted diamond earring just might be a new favorite.

Wanna make your own? Here's the how to:

creative index: painted clay earrings

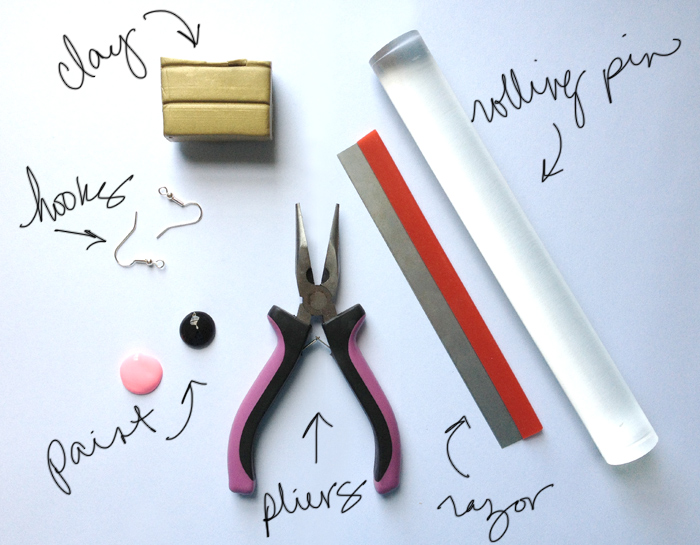
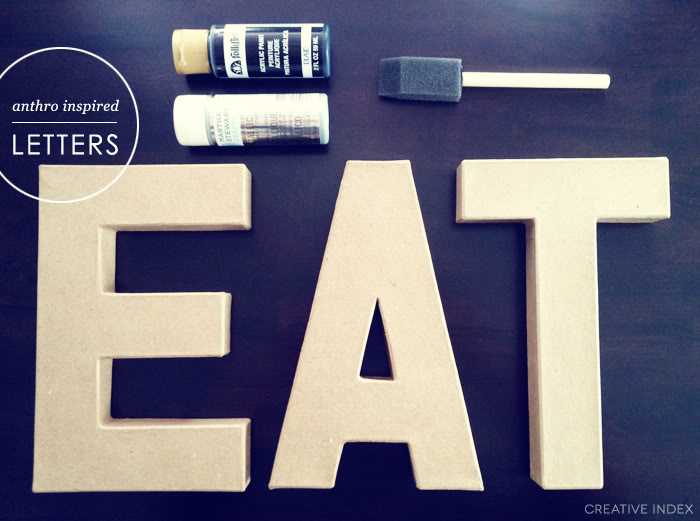
Supplies You'll Need:
Polymer Clay // Hook Earrings // Razor Blade // Needle Nose Pliers // Toothpick // Tape // Paint // Paint Brush

creative index: painted clay earrings

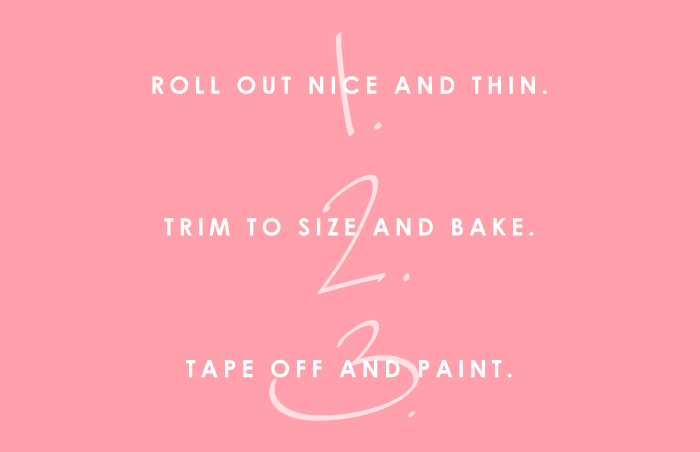
Here's What You Need To Do:
Roll out your clay nice and thin. // Cut out 2 diamond shapes. Mine are approx. 2.25"x1.75" // Use a toothpick and poke a hole in the top point of the diamond. // Place on a baking sheet (with some wax paper) and bake at 275 for about 25-30 minutes. //  When cool, tape off edges with tape and paint inside triangle (2-3 coats). // While paint is still wet, carefully peel off tape and let dry. // When paint is completely dry, fit the earring hooks through the holes and crimp shut.

creative index: painted clay earrings

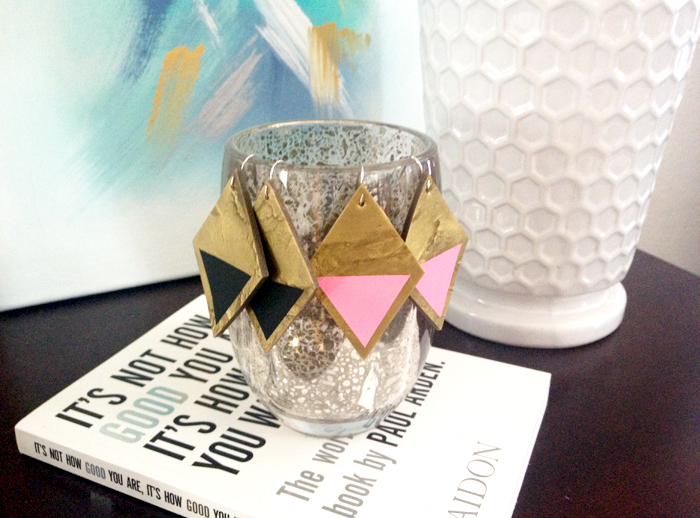
That's it! Now you have a new, super fun pair of earrings! :)

UPDATE: If you want to see how they look on, check out this photo I snapped on Instagram!

Helpful Notes + Tips:
// Work on a clean surface! The clay will pick up any little pieces of dirt/dust/etc...
// Make sure your shape isn't too thick. The earring hooks/jump rings won't close around it.
// I baked my at 275 for about 25 minutes. Your time might vary depending on your clay and/or oven.
// If you want them to dangle a little more, add a jump ring through the earring and then attach to the earring hook.


You can see my other clay tutorials here and here.

CREATE // Embellished Mittens

Hi everyone! Today I'd like to introduce on of my favorite blogger's, Erica from Caught on a Whim. I'm a big fan of her
DIYs and I've invited Erica to share one of her projects with you today...

- - - - -


Hi guys! I'm Erica and I blog over at Caught On A Whim. I'm a girl who loves DIYs, and I'm excited Jessica asked me to share this fun and cozy project with you today.

Winter is here and... brrrrrrr... it's chilly out there. Just because you're putting on bulky layers for warmth doesn't mean you can't still be cute. Dressing up a pair of mittens is the perfect way to add some style to your winter wardrobe. Ready to make your own embellished mittens?

Stuff you'll need:
+ Baubles
+ Mittens
+ Needle and thread


Method:
Any type of bead will do. I chose pearls, because they remind me of snowballs, which is perfect for the season.
Next, sew your beads onto your mittens in a random pattern.


Now, you'll have some fancy mittens to keep your hands warm this winter.

If you liked this sweet little project, be sure to drop by my DIY Gallery for lots of more fun crafty ideas. Thanks so much
for having me Jessica!


- - - - -

Erica, thanks for stopping by today! I really enjoyed having you here!

Now head on over and say hello to Erica! Make sure to check out her project gallery for more DIYs! :)

create // triangle necklace

DIY clay triangle necklace by creative index

Today I'm sharing another super simple necklace I made recently... a two-tone triangle necklace. (If you missed the first necklace, check it out here.) I've been having lots of fun with polymer clay lately. It's so EASY to use! I even have a few more project ideas up my sleeve. ;)

create // simple bar necklace


This little DIY was inspired by Lindsay over at Delighted Momma. She's always coming up fun DIYs and she's a big fan of polymer clay. I haven't worked with clay in years, so it was fun getting back into it. I ended up making two different necklaces (I've been wearing them a lot lately!) and I'm excited to share them with you!

create // anthro inspired letters

I've been obsessed with those zinc letters from Anthro ever since I laid my pretty little brown eyes on them. But at almost $20 bucks a pop, they are a bit out of my price range.

I really wanted to fill in an empty space above our stove, and with family coming into town this week, I made my way to the craft store for some supplies and I made my own.

anthro inspired letters by creative index

Want to make them yourself? Here's what you need to do.... it's EASY!

You'll need:
// black acrylic paint
// metallic (or pearl) paint (i like martha stewart)
// paper mache letters
// sponge brushes

First, paint the letters all black and let them dry completely. Then brush on the metallic paint using long stokes. The silver coat will give the letters a textured look and the matte finish.  Let them dry and hang wherever you want! (They're so lightweight, I just used a little masking tape!)

anthro inspired letters by creative index

And there ya have it! I L-O-V-E them! They really help to update this outdated kitchen! (one of the downfalls to renting! :-/)
Now I want to make a J and an ampersand for my office!

What do you think? Would you DIY them? Or do you prefer the originals?


And yes, I know there are lots of tutorials floating around Pinterest, but I wanted to share another one! Hope you don't mind! ;)


create it yourself


Bright. Bold. Easy.
Just wanted to share some of my favorite DIY's I've stumbled across recently.

So much creativity to be inspired by! Do you have a favorite DIY you've done or seen recently?

1. painted spoons // 2. rope vases // 3. hex nut bracelet // 4. half circle necklace

CREATE // cute gift wrapping idea

Hi there and Happy Friday!! I wasn't planning on doing a post today, but the super adorable Aarean from Color Issue had this really cute packaging idea inspired by Anthropolgie's gift wrapping garland. If you're like me and still have wrapping to do, maybe this will inspire you a little.... It's super easy, fun and of course colorful!


You'll Need:
- simple wrapping paper (use the back of one if you don't want any designs)
- scissors
- felt (three or four colors)
- thin ribbon... preferably with some sparkle to it ;-)
- small hold punch if you have one... if not scissors will do

Cut out a bunch of circles from leftover felt...


Punch two holes in each circle...


Then string the circles onto the long side of the ribbon...


Scrunch them nice and close together (the more circles you have the closer you'll have to scrunch them together... and personally I think the more the better!)


Once I knew they would meet in the middle I took both sides of the ribbon...


tied it in a knot and then for the middle (where you'd normally put a bow) I strung two felt circles on top of each other....


and tied another knot (so they'd scrunch together-- lots of scrunching in this project! ha!) to create a little flower :-)


I tied on a little bell (gives it a little ringy-blingy touch *ha) and slapped on a little gold round tag that I cut out from some paper I had... (I wanted to keep with the whole circular theme)


And there she sits, under the tree... waiting to be opened on Christmas day :-)

. . . . . . . . . . . . . . . . . . . .

Aarean's blog is on of my favorite reads. You really don't want to pass up her blog... it's full of colorful inspiration! And right now, she also has and extra soft Christmas giveaway going on... so don't miss out on that!


What's the status on your wrapping? Are you done?


Hope you all have a very Merry Christmas filled with lots of love and laughter. Savor these moments and remember the REAL reason and meaning of Christmas! :-)

My Favorite DIY's from Hey Gorgeous

Hello, Lovelies! Happy Thursday! Today I'm sharing with you my Top 3 DIY's from one of my favorite blogs, Hey Gorg. Most of you probably already know Rhi, but if you don't (or you're living under a rock) she's one of the sweetest, most genuine ladies out there and her blog is chock full of eye candy, DIY's and great advice. She's one crafty gal, and it was hard to choose, but these are my Top 3 pretty projects:


I simply adore milk glass. Finding real vintage milk glass can be pretty hard, not to mention expensive, so if you're looking for a cheap (and still lovely) alternative, give this DIY a try! Click here to make your own milk glass.


I'm pretty fond of this little DIY because I LOVE candles! I actually really enjoy making candles as a hobby, but I would have never thought to use a teacup as a holder! Boy, I tell ya, she's a genius! ;) Easy, super cute and perfect for wedding favors, home decor, showers, etc. Click here to make your own teacup candle.


Major cuteness alert!! This is my favorite Hey Gorg DIY!! When she posted this a few weeks back, I was completely smitten! It was bookmarked and pinned right away! ;) This garland would be fabulous for a bridal shower, an outdoor party and or even a nursery. Click here to make your own dixie cup garland.


So there ya have it... my Top 3 Hey Gorg DIYs. If you want to see more pretty projects, head on over to Hey Gorg and get inspired. I can't wait to see what else she has up her sleeve!

So what do you think? Do you have a favorite Hey Gorg DIY?


(projects via hey gorg, last two images via jenna mckenzie photography)


DIY: super sweet popsicle invitations


Hello, Lovelies! Happy Monday!! How was your weekend? It's been H-O-T here in Buffalo and I spent the weekend relaxing at the beach! :)

As I was browsing through Martha Stewart earlier, I stumbled across the sweetest DIY invitations. These retro-looking ice pops are sure to conjure some sweet flashbacks -- and definitely set the tone for an awesome summer party!

For all the details, head on over to Martha Stewart.


(image via martha stewart)

CREATE // typographic gift wrap.


How stinkin' cute is this?! How come I haven't thought of this already??
I am totally doing this the next time I need to wrap a gift!

LOVE!!


If you can't figure out how to do it, and want instructions,
click here.


(image found
here)

older home